PRIVATE GOLF COURSES IN VERO BEACH, FLORIDA
EXPERIENCE TWO OF THE BEST GOLF COURSES IN VERO BEACH
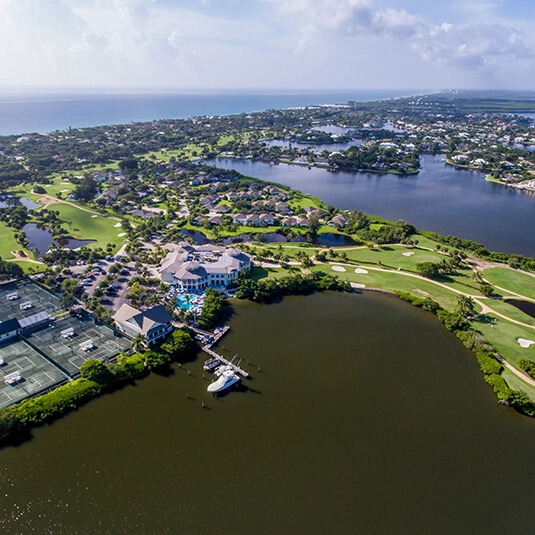
Located in beautiful Vero Beach, Florida, the Club offers an exceptional golf experience with two distinct 18-hole courses: The Moorings Course and Hawk’s Nest Course.
The Moorings Course is a picturesque Par 64 executive layout, uniquely designed with its front nine set on a scenic island, while the back nine winds gracefully beneath a canopy of majestic oak trees—creating a relaxed yet engaging round for players of all skill levels.
The Hawk’s Nest Course, a Par 72 championship layout, delivers a premier test of golf and is widely regarded as one of the finest and most challenging courses in the country. Celebrated for its thoughtful design and pristine conditioning, Hawk’s Nest has been consistently recognized among Florida’s best by Golf Digest and Top100GolfCourses.com.
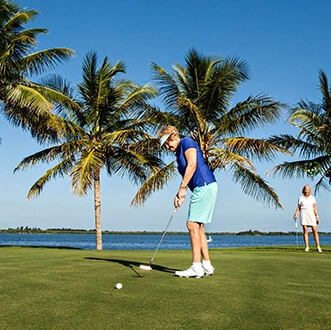
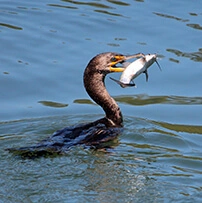
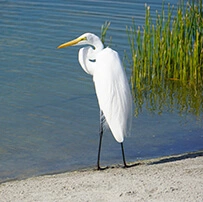
Pete Dye’s Moorings Course delivers a rewarding short-game challenge with stunning views of the Indian River Lagoon. The front nine is truly unforgettable set on an island, surrounded by water, and home to 40 bird species and more than 200 Florida native palms.
Both courses are certified by the Audubon Cooperative Sanctuary Program for Golf Courses, reflecting a strong commitment to environmental stewardship, wildlife habitat enhancement, and preservation of the game’s natural beauty.
Hawk’s Nest
Designed by Jim Fazio in 1987, Hawk’s Nest is widely regarded as a true “shot-maker’s” course—where strategy and precision are rewarded at every turn. This 18-hole, Par 72 championship layout is one of the few remaining “green courses” in Florida, offering a natural and thoughtfully designed golf experience.
Each hole is distinctly unique, with no two playing alike. Rolling fairways framed by striking sand dunes create both beauty and challenge, encouraging players to approach every shot with intention and creativity.
Recognized as one of the finest courses on Florida’s East Coast, Hawk’s Nest has earned a reputation for excellence and has proudly hosted prestigious events, including U.S. Open Qualifiers. Whether enjoying a competitive round or simply taking in the scenery, Hawk’s Nest offers an exceptional golf experience in a truly remarkable setting.

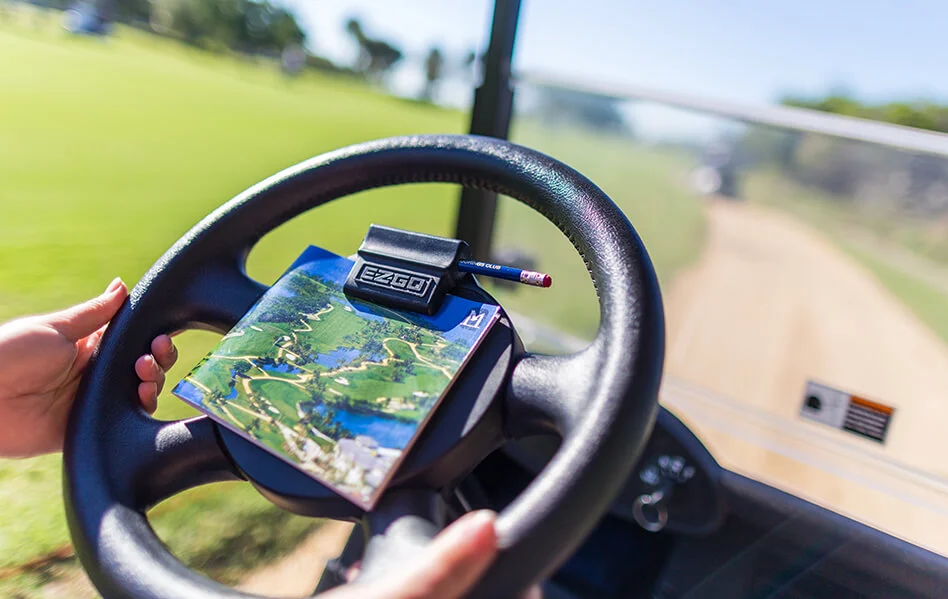
HOLE BY HOLE TOUR
The Hawk's Nest Course Tour
Hole #1
Par: 4Men's Handicap: 13/11Ladies' Handicap: 13
Description
This beautiful opening hole set the stage for an outstanding experience on one of the highest elevations on the golf course. Keep your drive left of the large natural sand area and live oak tree to the right. Second shots are to a deep green guarded by large bunkers on the right.
-
412
-
409
-
393
-
356
-
324
-
314
-
305
Hole #2
Par: 3Men's Handicap: 15Ladies' Handicap: 15
Description
This picturesque but difficult par 3 is framed by a large water hazard that wraps around the front and right sides of the green. Bunkers left, right and in the back further surround the putting surface on this very challenging hole.
-
185
-
177
-
155
-
147
-
122
-
117
-
96
Hole #3
Par: 4Men's Handicap: 1/5Ladies' Handicap: 5
Description
Tee shots on this beautiful par 4 should favor the right side of the fairway to avoid the elongated natural sandy area on the left. Play the downhill second shot to the right center of the green, safely away from the front left bunker.
-
433
-
409
-
391
-
374
-
333
-
325
-
304
Hole #4
Par: 5Men's Handicap: 11/1Ladies' Handicap: 1
Description
This par 5 is reachable in two for long hitters. An enormous natural sandy area flanks the entire left side of the hole. Your tee and second shot must be straight and well positioned. The third shot requires absolute finesse to hold this elevated green fronted by a large deep bunker.
-
528
-
528
-
513
-
482
-
446
-
433
-
428
Hole #5
Par: 4Men's Handicap: 3/7Ladies' Handicap: 9
Description
This beautiful par 4 requires a long, straight drive. Be careful of the large oak tree on the right side of the fairway. A successful tee shot leaves a long, straight second to a small, two tiered green that slopes from back to front. Two large bunkers frame the green's right side.
-
484
-
455
-
438
-
391
-
326
-
321
-
277
Hole #6
Par: 4Men's Handicap: 7/9Ladies' Handicap: 7
Description
This long dogleg left par 4 requires a straight drive that favors the right center of the fairway. From there you'll have the best angle to the large, back-to-front sloping green protected by two large, deep bunkers on the left.
-
463
-
426
-
397
-
360
-
308
-
303
-
292
Hole #7
Par: 3Men's Handicap: 17Ladies' Handicap: 17
Description
This par 3 plays into the prevailing wind, not easily detected from the tee, so most players end up short. Bunkers squeeze the entrance to the green, leaving little room for error. Once you are safely on this very tricky putting surface, read putts from all sides.
-
193
-
193
-
175
-
142
-
122
-
111
-
104
Hole #8
Par: 4Men's Handicap: 9/13Ladies' Handicap: 11
Description
The entire right side of this dogleg right par 4 is protected by water. Second shots must be precise to negotiate the water and deep bunkers protecting this long, narrow, three-tiered green. If your approach finds the correct tier, a birdie opportunity looms.
-
347
-
344
-
342
-
322
-
260
-
240
-
234
Hole #9
Par: 5Men's Handicap: 5/3Ladies' Handicap: 3
Description
Jim Fazio's Signature Hole! A natural sandy area flanks the left side of the elevated fairway on this demanding par 5. An accurate second shot is a must; anything hit to the right is trouble. An approach shot from the fairway gives you the best chance to find the large, undulating green.
-
617
-
568
-
540
-
516
-
482
-
435
-
427
Hole #10
Par: 4Men's Handicap: 10Ladies' Handicap: 6
Description
This beautiful dogleg right plays from tees that sit on one of the course's highest points. The fairway is framed by trees right and fairway bunkers left and right. Your second shot is to an elevated, sloping back to front green fronted by two bunkers. Do not miss the green long!
-
394
-
389
-
374
-
363
-
330
-
320
-
314
Hole #11
Par: 3Men's Handicap: 16Ladies' Handicap: 16
Description
This par 3 plays downhill to a slightly elevated green. The front of the green is narrow and protected by lateral water hazards and two large bunkers left and right. Make sure you get the correct yardage and account for the wind! Par on this hole is a great score.
-
203
-
198
-
183
-
175
-
146
-
141
-
134
Hole #12
Par: 4Men's Handicap: 4/8Ladies' Handicap: 12
Description
Trouble galore! Keep your drive in the fairway and avoid the natural sandy area to the right. This will leave you a mid to long iron to this elevated green. The narrow putting surface is guarded by a large bunker to the right and two large bunkers in back.
-
400
-
400
-
379
-
359
-
302
-
295
-
277
Hole #13
Par: 4Men's Handicap: 12/14Ladies' Handicap: 14
Description
On this short but demanding par 4, lateral hazards on both sides as well as an elongated fairway bunker right and a large-mouth bunker left offer all the challenge anyone could want from the tee. Two bunkers protect the left side of this very demanding green. Once again going long over this green is not an option!
-
347
-
347
-
342
-
320
-
308
-
293
-
287
Hole #14
Par: 5Men's Handicap: 2Ladies' Handicap: 2
Description
Keep your tee shot out of the large sandy area on the left on this relatively short par 5. Second shots to the right side, short of the fairway bunkers, offer the best angle to this wide but shallow green. Third shots from the lower left side are much tougher.
-
507
-
501
-
490
-
465
-
415
-
407
-
396
Hole #15
Par: 3Men's Handicap: 18Ladies' Handicap: 18
Description
Out-of-bounds on the left and two large-mouth bunkers protect the elevated, back-to-front sloping green on this par 3. Take enough club from the tee so you carry up and onto the putting surface. Get your par and move on to the next hole.
-
197
-
190
-
174
-
155
-
106
-
100
-
87
Hole #16
Par: 4Men's Handicap: 14/12Ladies' Handicap: 10
Description
Finding the fairway between the long natural sandy area on the left and large fairway bunkers to the right is a must. Protecting the green is another deep large-mouth bunker on the right. You can miss the green to the left, but going long or right spells big trouble..
-
399
-
394
-
377
-
371
-
353
-
347
-
340
Hole #17
Par: 5Men's Handicap: 6/4Ladies' Handicap: 4
Description
On this wonderful dogleg left par 5, play your tee shot down the right center of the fairway, avoiding the left side. Your second shot to the elevated fairway sets up a downhill approach shot to a green framed by four large bunkers. This green slopes sharply from back left to front right.
-
531
-
516
-
491
-
477
-
421
-
413
-
407
Hole #18
Par: 4Men's Handicap: 8/6Ladies' Handicap: 8
Description
On one of Florida's best par 4's, tee shots must find the fairway between the bunkers and natural sandy areas. The uphill approach shot is to a green flanked by deep bunkers. The narrow front portion of the putting green slopes to the front. The wider rear section of the putting green slopes from back right to front left.
-
406
-
406
-
400
-
382
-
317
-
317
-
307
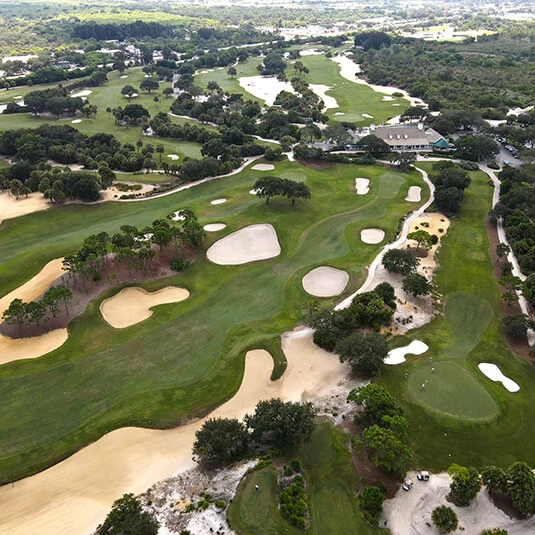
Hawk’s Nest Golf Course is carved from 200 acres of Florida’s maritime sand ridge, where natural elevation changes and sweeping vistas create one of the most visually striking golf settings in the state. Stretching 7,015 yards from the longest tees, this Par 72 layout carries a 75.2 rating and a 148 slope, offering a championship-caliber test while remaining welcoming to golfers of all abilities through its multiple tee options.
Designed by Jim Fazio, the course embraces the land rather than reshaping it. Rolling fairways flow naturally through sculpted dunes, accented by native vegetation and framed by expansive, unobstructed views. Strategic bunkering carved directly from the dunes adds both beauty and precision demands, while water features on select par-3 holes draw from natural wetlands and a preserved drainage pond system.
Unlike typical Florida courses, Hawk’s Nest offers wide playing corridors free of residential development, allowing the landscape itself to take center stage. Every hole feels isolated, natural, and distinctly routed through untouched coastal terrain. The course’s name traces back to its origins: during early site planning, founding owner Sam Bell observed a hawk circling above in a steady, familiar pattern returning to its nest. That moment of discovery inspired the name Hawk’s Nest, a fitting tribute to the land’s natural rhythm and wildlife.

The Moorings
The Moorings Golf Course, designed by world-renowned architect Pete Dye, is widely regarded as one of his celebrated “Little Gems.” This distinctive Par 64, 18-hole layout delivers a rare golfing experience defined by intimacy, strategy, and breathtaking natural beauty.
The front nine is one of the most unique in the game, fully embraced by water, where precision shot-making is rewarded, and every hole plays with a sense of drama and visual impact. Golfers are treated to constant encounters with native wildlife and serene water scapes that make each round as memorable as it is challenging.
The back nine offers a striking contrast, winding beneath towering, majestic oaks and opening to some of the most beautiful views of the Indian River Lagoon in South Florida. Here, the pace softens, but the scenery elevates, creating a tranquil yet captivating finish. Together, The Moorings blends bold design and natural beauty into a course that is as distinctive as it is unforgettable.

HOLE BY HOLE TOUR
The Mooring's Club Course
Hole #1 - Spoonbill
Par: 3Gold/Blue/White Handicap: 13Red Handicap: 15
Description
The first hole is a great little starting hole. This par 3 is 163 yards in length from the back tees and looks easy. The first fairway runs southwest with water left on the tee and a pretty little stream that runs across the fairway and up along the right side of the green. Don’t let the scenery distract you, because the first green is fast and tricky.
-
163
-
163
-
153
-
115
Hole #2 - Porpoise Bay
Par: 4Gold/Blue/White Handicap: 15Red Handicap: 7
Description
With a long narrow waste bunker and a magnificent view of the Indian River Lagoon along the entire left side of the fairway, number two is a par 4 and it’s not too long at about 290 yards. Of course when the good players are here they are going to want to drive the green, but in my opinion, that’s about the worst approach you can take because it’s really hard to hit such a small green. The best way to play the hole is to just hit a shot out about 190 yards or so and then another hundred yard shot to the hole. Since the green is small any second shot on the green leaves you with a legitimate birdie putt.
-
277
-
277
-
266
-
242
Hole #3 - Osprey
Par: 4Gold/Blue/White Handicap: 1Red Handicap: 3
Description
In my opinion, the third hole is undoubtedly the hardest hole on the course, and judging by the way it’s rated on the scorecard, it might very well be the hardest hole in Indian River County. It’s a 400-yard par 4 with an elevated green that has a slight ridge running right down the middle. So if you hit the right side of the green it can bounce off to the right, and if you hit the left side it might bounce left. Being both very difficult to putt and well bunkered and with water on both left and right of the green, my approach to this hole is never to worry about where the flag is. Instead, just try to get it on the front of the green. If you can make it in two putts and get out of there, that’s a great way to play the 3rd hole.
-
404
-
383
-
320
-
278
Hole #4 - Mangrove
Par: 3Handicap: 9
Description
This is one of my favorite holes. It’s a 162 yard par 3. During the winter season, you get a wind blowing off the ocean from the east, but the hole runs north to south, so the wind blows left to right. Running along the entire left side of the hole is a long and narrow seaside waste bunker backed by mangroves and the lagoon. When the high tide water from the lagoon rises, the seaside waste bunker looks very pretty. If you’re a high handicapper, I might recommend hitting short right of the green on #4.
-
162
-
162
-
139
-
108
Hole #5 - Poco Loco
Par: 3Handicap: 17
Description
The 5th hole is the short but very popular par three. Only 89 yards, it’s still an intimidating forced carry.
-
89
-
89
-
83
-
78
Hole #6 - Porpoise Point
Par: 4/5Gold/White Handicap: 5Blue/White Handicap: 3Red Handicap: 1
Description
The 6th hole, a 362-yard dogleg right, is a tough little par four and is rated as the 3rd hardest hole. This is a beautiful golf hole with the Indian River Lagoon along the left side of the narrow fairway, and a reachable man-made lake on the right. It’s always very nice to hear members say, “I saw the dolphins playing out left of number 6 today.”
-
362
-
362
-
330
-
342
Hole #7 - Manatee Pocket
Par: 3Handicap: 11
Description
Alice (my wife and co-designer) pretty much designed the 7th hole on her own. It’s a 155 yards, par 3 with a forced carry over the lagoon from the back tees, but no real forced carry from the forward tees. There are mangroves along the water on the left. Once again, if you draw it too much you’ll be in the Indian River Lagoon. Even though the 7th green tends to slope ever-so-slightly away from the water, this is still a good hole to hit a nice little fade, because you generally get the wind off the ocean so if you fade a little, that little cut can hold its line into the green. Director of Golf, Tom Thornton, named hole #7 Manatee Pocket because it’s a great place to spot a manatee.
-
409
-
393
-
356
-
314
Hole #8 - Snook
Par: 4Gold Handicap: 3Blue/White/Red Handicap: 5
Description
Now hole #8 is another really good hole. It’s a 396-yard dogleg right, par four, with trees and water on the right and the seaside waste bunkers, mangroves and the lagoon on the left. The small 8th green slopes left toward the water here, plus you’ve got to hit over a bunker that is guarding the front of the small green. So you’re better off trying to fade your second shot onto the green, especially with the wind typically coming from the southeast on this hole.
-
396
-
351
-
311
-
263
Hole #9 - Little Starvation
Par: 3Gold/Blue/White Handicap: 7Red Handicap: 13
Description
The last hole on the front nine is a beautiful 156-yard 3 over the lagoon and toward the clubhouse. This hole is definitely one of the toughest par 3s on the course. Also, with the prevailing wind blowing in your face, the 9th hole seems a lot longer than it is. Over the past 40 years, I’ve hit everything from a pitching wedge to a 4-iron on this hole, so make sure you use enough club and hit it solid.
-
156
-
156
-
137
-
106
Hole #10 - Duck
Par: 4Gold Handicap: 14Blue/White Handicap: 12Red Handicap: 10
Description
The 10th hole is another very interesting hole. Tiger Woods could probably drive this 260-yard par 4 with a 4-iron, but with a pond on the right and out-of-bounds on the left, I think the smart play for most golfers might be to lay-up and then hit a wedge into the small elevated green.
-
260
-
260
-
251
-
222
Hole #11 - La Pared
Par: 3Handicap: 16
Description
Not the toughest par 3, the 11th hole is one of the prettiest holes on the course. With magnificent old oaks along the left side, it’s a 127 yards from an elevated tee, over the water, to a big beautiful elevated green.
-
127
-
119
-
105
-
75
Hole #12 - Oak Hole
Par: 4Blue/White Handicap: 6Gold/Red Handicap: 4
Description
This is the fourth toughest hole on the course. It’s a 327- yard par four into the prevailing wind to a treacherous green that’s bunkered in front and back.
-
327
-
327
-
315
-
297
Hole #13 - South Beach
Par: 4Handicap: 18
Description
This is a cute hole, 123-yard par. Its large green has lots of shaping and beautiful bunkering.
-
123
-
123
-
105
-
92
Hole #14 - Sabal Pointe
Par: 4Gold Handicap: 4Blue/White/Red Handicap: 2
Description
I think this is a really fun hole. It’s pretty much straight away, with your tee shot most often hitting into a southeast wind. The second toughest hole on the course, the 361-yard par four, has out-of-bounds on the left and a forced carry over the only fresh water lake on the course. The 14th green is guarded on the front left by a large bunker.
-
361
-
361
-
318
-
302
Hole #15 - Cutlass Cove
Par: 3Gold Handicap: 8Blue/White/Red Handicap: 14
Description
Changing direction the 180-yard par three, turns north with a tee shot that is forced to carry a beautiful waste bunker to the very large, undulating, and well bunkered 15th green.
-
180
-
158
-
116
-
104
Hole #16 - "The Road Hole"
Par: 4/5Gold Handicap: 2Blue/White Handicap: 10Red Handicap: 4
Description
The 440 yard is the only par five at the Club. This is a very scenic hole with a view of the water at Cutlass Cove just left of the tee and a very different view of the lagoon and Porpoise Bay up near the green. Medium length hitters are advised to aim their tee shots between two big banyan trees that are out in the middle of the 16th fairway. Though, it’s guarded by a big waste area directly in front of the green, and another bunker to the left of the green, some of the longer players still manage to reach the 16th in two only to find that the swales and hollows shaped into this challenging-but-true Tifeagle green make it a very difficult green to hold and putt.
-
440
-
440
-
417
-
401
Hole #17 - Beach Treat
Par: 3Gold Handicap: 10Blue/White Handicap: 6Red Handicap: 12
Description
This is a par 3 that is 146 yards over a lake to a green that’s protected on the left by an enormous bunker, so I’d say if you’re going to miss it, miss it short right. I like #17; it’s an excellent golf hole.
-
146
-
146
-
119
-
109
Hole #18 - Sunset Grille
Par: 4Gold Handicap: 12Blue/White/Red Handicap: 8
Description
This is a great finishing hole, and a lot of fun to play. The little island tee area hidden back amongst the oak trees makes your tee shot a forced carry over the water. It’s a 306-yard par four over a lake with out-of-bounds on the left and water running all along the right side of the fairway. This is a terrific hole for putting pressure on final hole bets!
-
306
-
306
-
275
-
261
In 1974, world-renowned architect Pete Dye was commissioned to design what would become a truly one-of-a-kind golf experience on a 70-acre peninsula extending into the Indian River Lagoon. This remarkable setting lies within one of the most biologically diverse estuaries in North America, home to thousands of species of plants and animals, including a significant population of Florida manatees.
Designed long before modern “tee it forward” concepts, The Moorings Golf Course was built for enjoyable, efficient play, with a recommended pace of approximately 3 hours and 25 minutes from the back tees, encouraging a relaxed yet engaging round without the need to rush.
At just 4,434 yards, this Par 64 layout is a thinking player’s course. Success comes not from distance, but from strategy, precision, and smart shot placement. With nine par 3s, eight par 4s, and a single par 5, every club in the bag comes into play, rewarding creativity and course management over sheer power.